Using Canva (or other software) to Create a Design In Wise Pelican
How to Upload an Image to Wise Pelican
We understand that you may have some favorite graphic design software you simply can't live without.
All of our postcards are 6" x 9" with a 0.25" white border all of the way around to give them a squared off, clean, professional appearance.
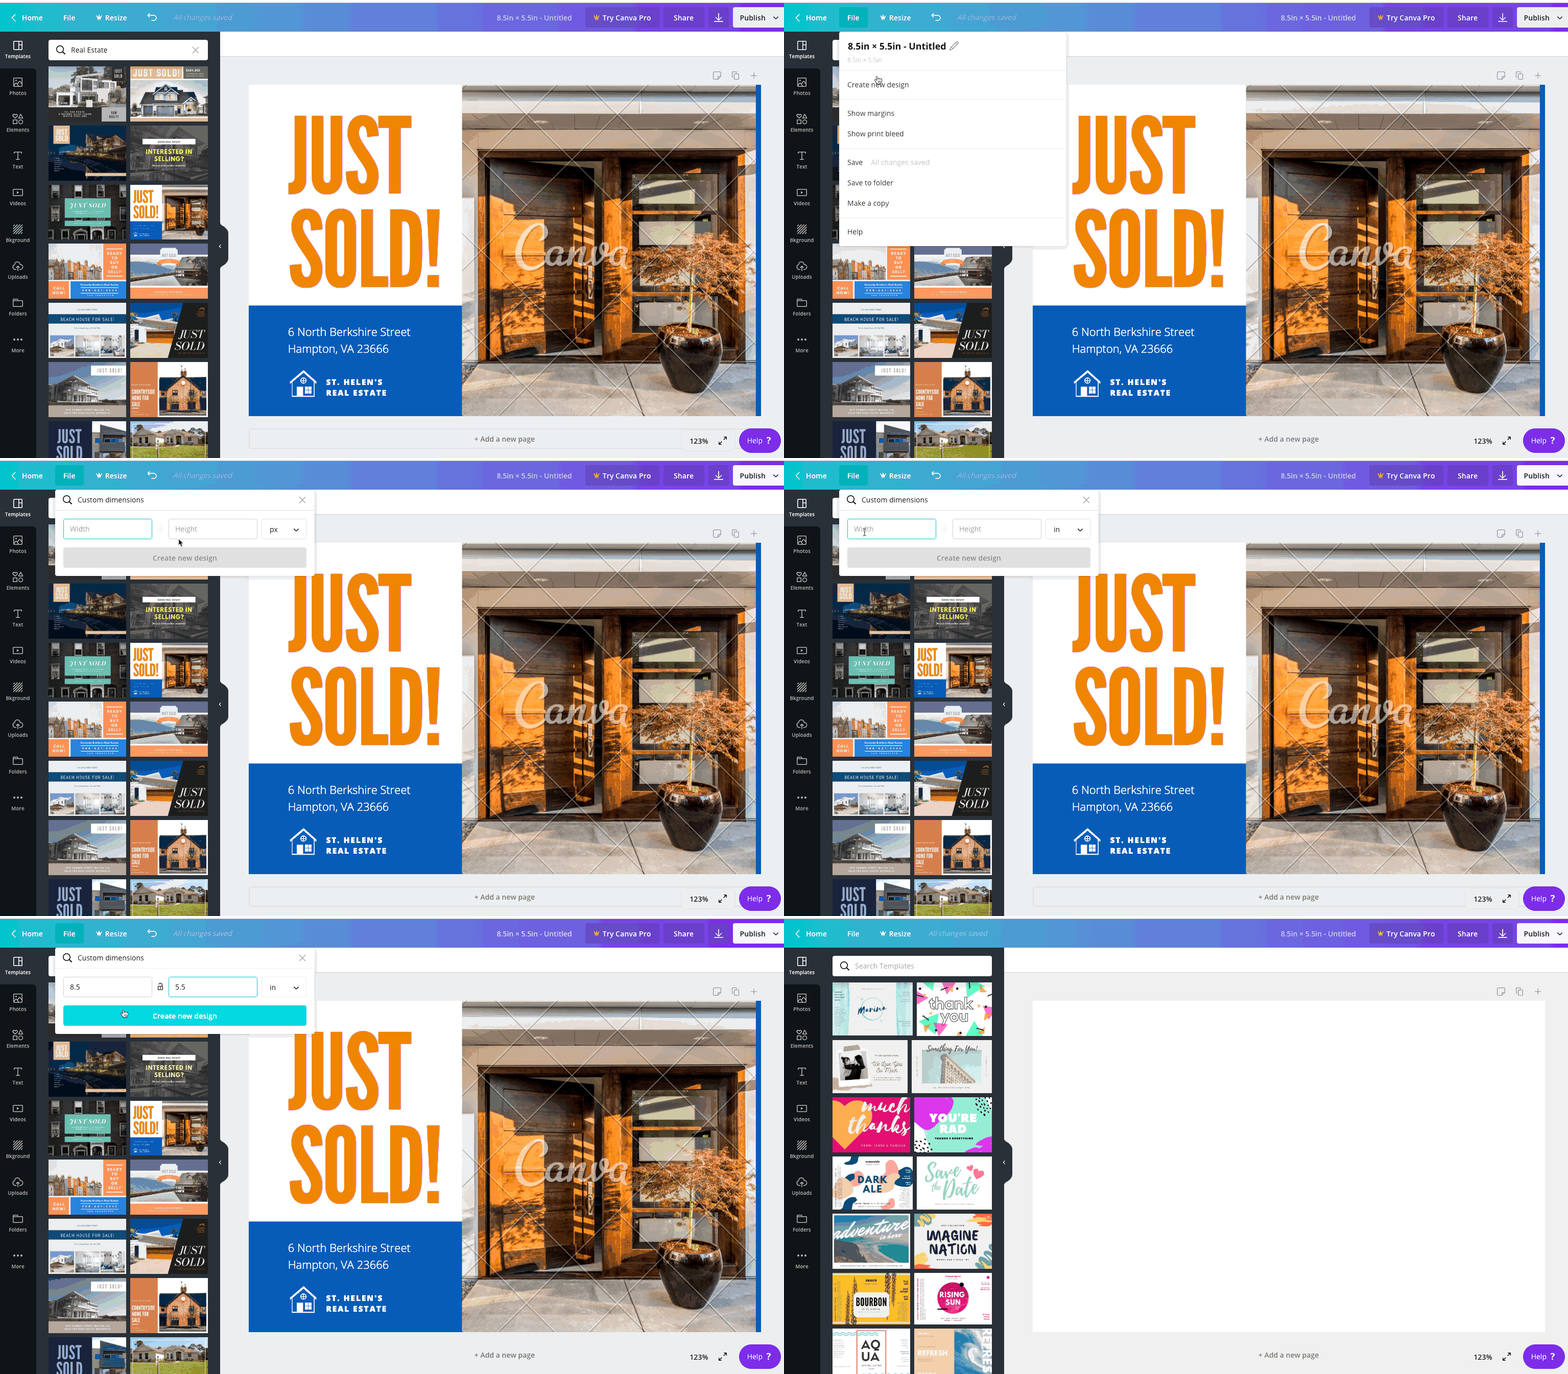
With that being said, when designing files, please set the size to 8.5 inches wide x 5.5 inches inches tall (height).

Now that you've set the canvas size. Design away.
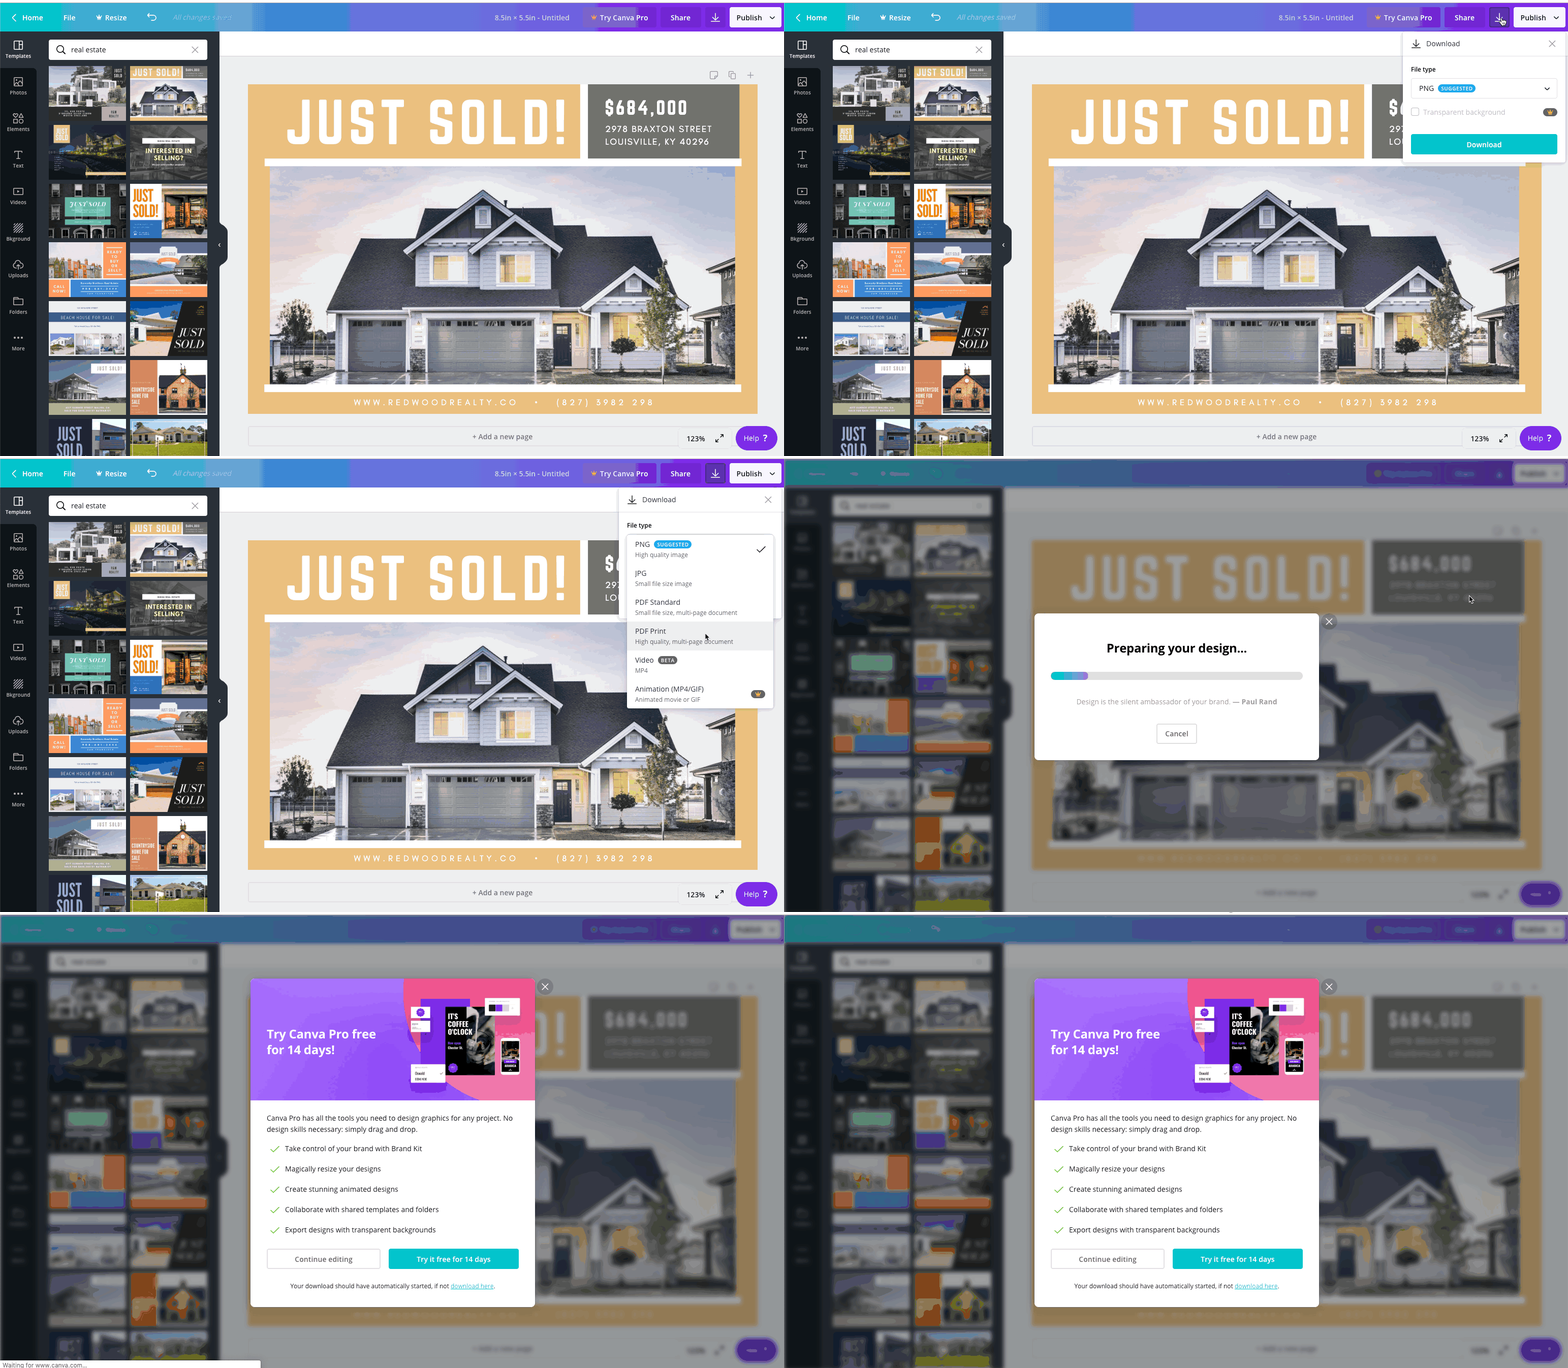
Once you've completed creating your design, please download / save it in the largest file size possible. In Canva, that means downloading as a PNG.
NOTE: YOU SHOULD HAVE A ONE PAGE DOCUMENT ONLY. ONLY THE FRONT SHOULD BE CREATED IN CANVA. THE BACK NEEDS TO BE CREATED IN WISE PELICAN. IF YOU DECIDE TO CREATE AN IMAGE TO TRANSFER TO THE BACK OF WISE PELICAN, PLEASE MAKE SURE THAT IT IN NO WAY INTERFERES WITH THE REQUIRED ADDRESSING AND POSTAGE SPACE. PLEASE KEEP THIS IMAGE TO THE LEFT OF THE ADDRESS BLOCK.

Once you've downloaded the image from Canva, you'll need to use it replace the image on the front in Wise Pelican.
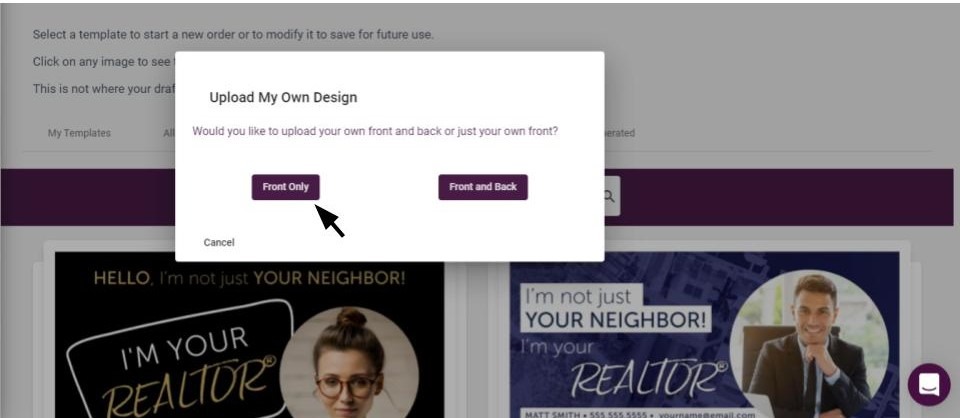
Navigate to the "Upload My Own Design" section under templates.
.jpg)
Select "Front Only", then choose a template, and click on "Edit Design".

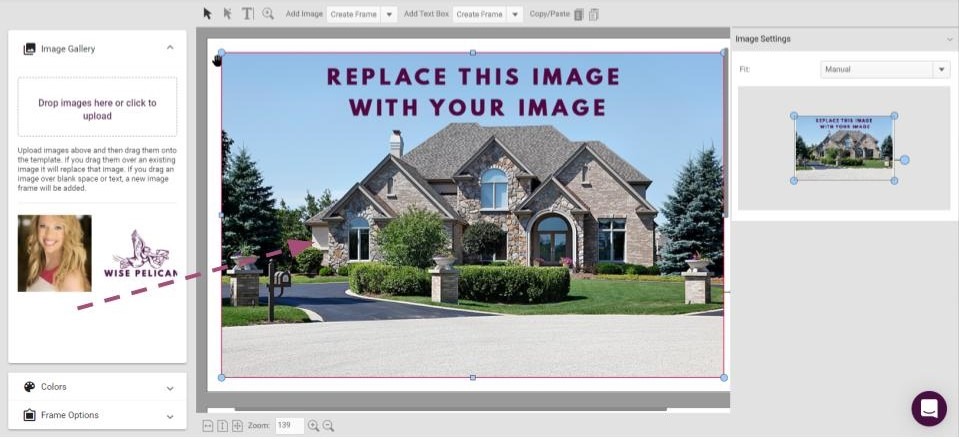
Once you are in the editor you will need to upload your design which you can do on the left side. Once uploaded just click and drag the image onto the template and it will automatically load.
- If it doesn't automatically resize then you can manually resize it on the right side by clicking and dragging one of the highlighted corners.

Ensure that you scroll down in the editor to make the necessary edits to the back side of the template and then save and exit the editor. You will then be ready to complete your order.
Did this answer your question?